How to Create PDF Files on Mac (Preview & JPG Tips)
Learn how to create PDF files on Mac using Print, Preview, and Quick Actions. Includes JPG conversion and tips for managing PDFs.

Creating PDFs from scratch
If you want to create a PDF on Mac from a blank page, you usually have two practical options. First, use an app that can create documents and export them as PDF. Second, use macOS Preview to build a simple PDF you can edit later.
Start in the app you already use. Pages, Word, and even a text editor can export via PDF export. If you are starting with notes, create the content first, then export to PDF using the Print dialog.
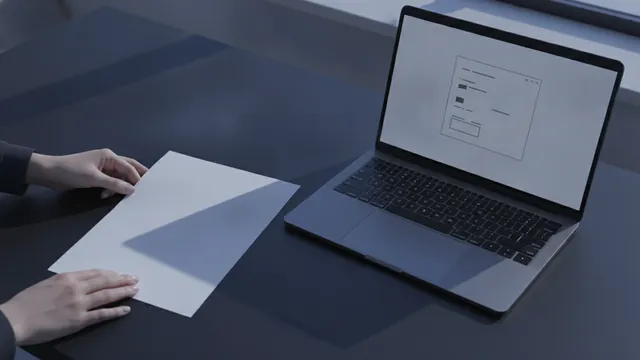
For a quick blank PDF you can annotate, open macOS Preview. Choose File, then New from Clipboard if you copied something. Otherwise, use File and create a new document, then save it as a PDF. This is a simple way to begin PDF editing tools workflows.
- Create the content in your main app, then export to PDF.
- Use Preview for a clean starting point when editing is next.
- Prefer PDF export so formatting stays stable.

Save an existing document as a PDF
This is the most common “how to create pdf files on mac” path. Open the document in an app that supports PDF export. Examples include Pages for .docx and .pages, Numbers for spreadsheets, and many other apps.
Next, use the Print dialog. In macOS, Print is more than printing. It includes a “Save as PDF” option that converts your document into PDF format.
When you see the Print window, look for a button or dropdown that says “Save as PDF.” Then choose a file name and a folder. This is also where you can pick paper size or scaling if the app offers those settings.
- Open the file in its native app.
- Go to File and choose Print.
- Select Save as PDF in the Print dialog.
- Pick the name and location, then click Save.
To keep output consistent, do a quick check on the first page. Scan headings and margins before saving a batch. If your document includes embedded images, confirm they appear sharp enough for your purpose.
That same flow supports “save document as pdf mac” for most office-like files. It also works for many report templates and forms, even when the app does not have a dedicated PDF button.

Combine multiple files into one PDF
If you need to combine documents, you do not always need an extra tool. Finder can help you “combine pdf files on mac” by using a quick action called Create PDF. This method is especially handy when you already have several files in one folder.
In Finder, select multiple files you want in one PDF. Then right-click (or use a control-click) and look for the Quick Action menu. Choose Create PDF to merge the selected items into a single PDF file.
The resulting PDF keeps a practical order. Finder typically follows the order of your selected files. If you want page order to match a specific sequence, select files in the order you want first.
- Put all files in one folder first.
- Select them in the order you want.
- Use Finder’s Quick Actions to make one PDF.
For scanned documents, this can still work, but quality depends on the scans. If you combine multiple scans, keep an eye on skew and contrast. After merging, you can use macOS Preview for basic PDF editing tools like rotation and page trimming.
While you are at it, plan your names. A clear output name like “Spring-Report-Master.pdf” is easier to find later than “Untitled.pdf.”

Create a PDF from images like JPG
When you have image files, the goal is usually “create pdf from jpg mac.” You can do this using Preview, which is built into macOS and designed for basic PDF creation.
Open Preview, then open the image. Drag the JPG into Preview, or use File and open. Once the image is open, you can save it as a PDF.
For multiple images, open one, then insert the rest. Preview can treat each image as a page. After that, use File and choose Export as PDF or save as a PDF depending on your macOS version.
- Open Preview.
- Open a JPG file in Preview.
- Use the page thumbnails view for multi-image setups.
- Save or export as a PDF.
Check two things before you finalize. First, look at the page size. Preview may keep the default size, which can add borders if your JPG is wide or tall. Second, confirm orientation, especially if the original photo was rotated.
If you need better control, Preview is still a good starting point. But for heavy conversion or batch work, you might prefer a dedicated file conversion workflow. Still, for most “how to create pdf files on mac” image needs, Preview gets you there quickly.

Use Preview for PDF creation and basic editing
Preview is the most important tool to understand for PDF editing and “using Preview for PDF creation.” It is included with macOS, and it handles many everyday tasks. You can open a file, reorder pages, rotate pages, and export again.
To get started, open the PDF in Preview. If you do not have a PDF yet, you can also create one from scratch in Preview and then save it. This makes Preview useful both for building and for finishing work.
Use the thumbnails sidebar to manage pages. You can drag thumbnails to reorder. You can also delete pages you do not need. For scanned docs, rotate pages until text reads normally before exporting a final copy.
| Task | Where to do it in Preview |
|---|---|
| Reorder pages | Thumbnails sidebar, then drag pages |
| Rotate a page | Toolbar rotate controls or page menu |
| Trim margins | Tools menu, then crop or adjust |
| Save changes | File then Save or Export as PDF |
Be mindful about file names and locations. When you edit a PDF, save a version copy first. For example, keep “Project-Plan-Draft.pdf” and export “Project-Plan-Final.pdf.” This avoids losing the original output.
Preview also helps when you need to create PDFs from existing document content indirectly. If you exported a file first, but the result has pages that need cleanup, Preview gives you a safe way to adjust without going back to the source app.
Tips for managing PDF files on macOS
Good document management makes future conversions much faster. Start by using predictable folder paths. For example, create a “PDFs” folder inside each project folder. Then save all exported PDFs there.
When you use the Print dialog “Save as PDF” flow, you get a default name from the source file. That name may be too vague. Rename using a simple pattern: date, project, and document type. People often search by these terms later.
Pay attention to output quality. If a PDF looks blurry, the issue is usually the original image resolution or scan settings. If you re-run a conversion, use the same source and re-check the first page.
If you are working across devices, it helps to know what changes. For example, you may also need to create PDFs on iphone for the same files later. The idea is similar, but the user interface differs. On iPhone, you typically use share or print-style export flows that produce a PDF you can save.
- Use one folder per project for clean file conversion.
- Save version copies when editing in Preview.
- Rename PDFs with a date and clear purpose.
- Check page order after combining files.
Finally, learn one dependable workflow and stick to it. Many people use Print for “create pdf on mac from existing document,” then Preview for cleanup. Finder’s Create PDF becomes the fast option for bulk merging. Together, these tools cover most real-world needs without extra downloads.
When you should use external PDF editing tools
Preview covers most basics, but some jobs go beyond it. If you need advanced PDF editing, form filling, or complex batch updates, dedicated PDF editing tools can help. The right choice depends on the work level you do.
For example, if you must add many signatures or fill structured forms repeatedly, external tools can save time. If you need to merge hundreds of files regularly, a batch tool may reduce manual steps.
Still, do not rush to replace Preview. For typical “how to create pdf files on mac” tasks, Preview remains the fastest path. It is reliable and built into macOS.
Quick rule: Export from your source app, then finish in Preview.
Frequently asked questions
- How do I create a PDF file on Mac from a Word or Pages document?
- Open the document, then choose File > Print. Select “Save as PDF,” pick a name and folder, and click Save.
- Where is the “Save as PDF” option on macOS?
- It appears inside the Print dialog. Look for a dropdown or button labeled “Save as PDF” in the Print window.
- How do I create a PDF from JPG on Mac?
- Open the JPG in Preview. Then save or export it as a PDF, and check page size and orientation first.
- Can I combine multiple files into one PDF on Mac without extra apps?
- Yes. In Finder, select the files you want, then use the Create PDF quick action from the context menu.
- How can I edit a PDF after creating it?
- Open the PDF in Preview. Use the thumbnails sidebar to reorder, rotate, and remove pages, then export or save again.
- How do I create PDFs on iPhone if I need the same output later?
- Use a share or print-style export flow in the app you’re working with. Save the generated PDF to Files when prompted.
Related reading

How to Sign Electronically on a PDF (Plus Fill PDF Forms)
Sign and fill a PDF electronically using secure tools and clear steps.

Biology: How Life Works 4th Edition PDF — What’s Inside
See the key themes, chapter flow, and learning tools in Biology: How Life Works 4th edition PDF.
How to Install Adobe PDF Printer on Your PC
Get the Adobe PDF printer working in Windows and fix common setup issues fast.